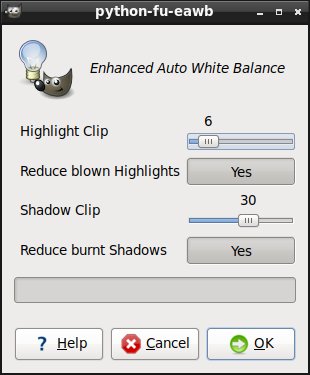
如何在Python-Fu中完成相当于Gimp的Color,Auto,White Balance的操作?
我能找到的唯一功能是:gimp-color-balance,它采用适用的参数:preserve-lum(osity),cyan-red,magenta-green和yellow-blue。
我不确定要为这些参数传递哪些值来复制标题中的菜单选项。
5 个答案:
答案 0 :(得分:0)
根据GIMP doc,我们需要丢弃红色,绿色和蓝色直方图各端的像素颜色,这些像素颜色仅用于图像中0.05%的像素,并尽可能扩展其余范围( Python代码):
img = cv2.imread('test.jpg')
x = []
# get histogram for each channel
for i in cv2.split(img):
    hist, bins = np.histogram(i, 256, (0, 256))
    # discard colors at each end of the histogram which are used by only 0.05%
    tmp = np.where(hist > hist.sum() * 0.0005)[0]
    i_min = tmp.min()
    i_max = tmp.max()
    # stretch hist
    tmp = (i.astype(np.int32) - i_min) / (i_max - i_min) * 255
    tmp = np.clip(tmp, 0, 255)
    x.append(tmp.astype(np.uint8))

# combine image back and show it
s = np.dstack(x)
plt.imshow(s[::,::,::-1])
结果与GIMP的“颜色->自动->白平衡”之后非常相似
UPD::我们需要np.clip(),因为OpenCV和numpy将int32强制转换为uint8:
# Numpy
np.array([-10, 260]).astype(np.uint8)
>>> array([246,   4], dtype=uint8)
# but we need just [0, 255]
答案 1 :(得分:0)
要完成@ banderlog013的答案,我认为Gimp Doc指定首先丢弃每个通道的末端像素,然后扩展其余范围。我相信正确的代码是:
img = cv2.imread('test.jpg')
balanced_img = np.zeros_like(img) #Initialize final image

for i in range(3): #i stands for the channel index
    hist, bins = np.histogram(img[..., i].ravel(), 256, (0, 256))
    bmin = np.min(np.where(hist>(hist.sum()*0.0005)))
    bmax = np.max(np.where(hist>(hist.sum()*0.0005)))
    balanced_img[...,i] = np.clip(img[...,i], bmin, bmax)
    balanced_img[...,i] = (balanced_img[...,i]-bmin) / (bmax - bmin) * 255
我用它获得了良好的效果,请尝试一下!
答案 2 :(得分:0)
如何从本质上获得相当于 GIMP 的 Colors --> Auto --> White Balance 功能:
在 Ubuntu 20.04 上测试。
从我的 eRCaGuy_hello_world 存储库下载以下代码:python/auto_white_balance_img.py。
安装依赖:
pip3 install opencv-python  # for cv2
pip3 install numpy
现在这里有一些功能齐全的代码,不像这里的其他一些答案是片段,缺少 import 语句之类的东西。我向@Canette Ouverture's answer here和@banderlog013's answer here借。
创建文件auto_white_balance_img.py:
#!/usr/bin/python3

import cv2
import numpy as np

file_in = 'test.jpg'

file_in_base = file_in[:-4] # strip file extension
file_in_extension = file_in[-4:]

img = cv2.imread(file_in)

# From @banderlog013's answer: https://stackoverflow.com/a/54864315/4561887
x = []
# get histogram for each channel
for i in cv2.split(img):
    hist, bins = np.histogram(i, 256, (0, 256))
    # discard colors at each end of the histogram which are used by only 0.05%
    img_out1 = np.where(hist > hist.sum() * 0.0005)[0]
    i_min = img_out1.min()
    i_max = img_out1.max()
    # stretch hist
    img_out1 = (i.astype(np.int32) - i_min) / (i_max - i_min) * 255
    img_out1 = np.clip(img_out1, 0, 255)
    x.append(img_out1.astype(np.uint8))

# From @Canette Ouverture's answer: https://stackoverflow.com/a/56365560/4561887
img_out2 = np.zeros_like(img) # Initialize final image
for channel_index in range(3):
    hist, bins = np.histogram(img[..., channel_index].ravel(), 256, (0, 256))
    bmin = np.min(np.where(hist>(hist.sum()*0.0005)))
    bmax = np.max(np.where(hist>(hist.sum()*0.0005)))
    img_out2[...,channel_index] = np.clip(img[...,channel_index], bmin, bmax)
    img_out2[...,channel_index] = ((img_out2[...,channel_index]-bmin) /
        (bmax - bmin) * 255)

# Write new files
cv2.imwrite(file_in_base + '_out1' + file_in_extension, img_out1)
cv2.imwrite(file_in_base + '_out2' + file_in_extension, img_out2)
使 auto_white_balance_img.py 可执行:
chmod +x auto_white_balance_img.py
现在将上面文件中的 file_in 变量设置为您想要的输入图像路径,然后运行:
python3 auto_white_balance_img.py
# OR
./auto_white_balance_img.py
假设您设置了 file_in = 'test.jpg',它将生成以下两个文件:
test_out1.jpg# @banderlog013's answer here 的结果test_out2.jpg# @Canette Ouverture's answer here 的结果
答案 3 :(得分:-1)
根据我的理解,快速查看源代码(或多或少用测试图像确认),这些是无关的,并且在幕后,Colors>Auto>White Balance:
- 获取每个频道的直方图
- 获取确定底部和顶部0.6%的值
- 使用与“Levels”非常相似的内部调用,使用这两个值作为黑点和白点来拉伸该通道的值范围。
使用合成图像证明:
在:
后:
所有这些在Python中都不难做到。
答案 4 :(得分:-1)
- 我写了这段代码,但我无法理解我的错误
- 我无法从一个代码实例的列表中删除 None 值,但我可以在另一个实例中。为什么它适用于一个细分市场而不适用于另一个细分市场?
- 是否有可能使 loadstring 不可能等于打印?卢阿
- java中的random.expovariate()
- Appscript 通过会议在 Google 日历中发送电子邮件和创建活动
- 为什么我的 Onclick 箭头功能在 React 中不起作用?
- 在此代码中是否有使用“this”的替代方法?
- 在 SQL Server 和 PostgreSQL 上查询,我如何从第一个表获得第二个表的可视化
- 每千个数字得到
- 更新了城市边界 KML 文件的来源?


