多线程RayTracer使用两种不同的算法生成工件
我一直在尝试使用我的RayTracer实现多线程,但我正在尝试与MT相关的奇怪工件。现在我确信这与算法无关,因为它发生了两种不同的方法。
Bellow是MT算法所发生的事情,其中第一个线程负责图像的下半部分而另一个负责上半部分。在第一种情况下,我在执行任何操作之前发送thread0以返回,在第二种情况下,thread1返回。


按预期工作。现在两个线程一起工作:
让我们转到第二个算法,它采用逐像素的方法,线程0 - > pixel0,thread 1 - > pixel1,thread 0 - > pixel2,thread 0 - > pixel3类型,pixel3。
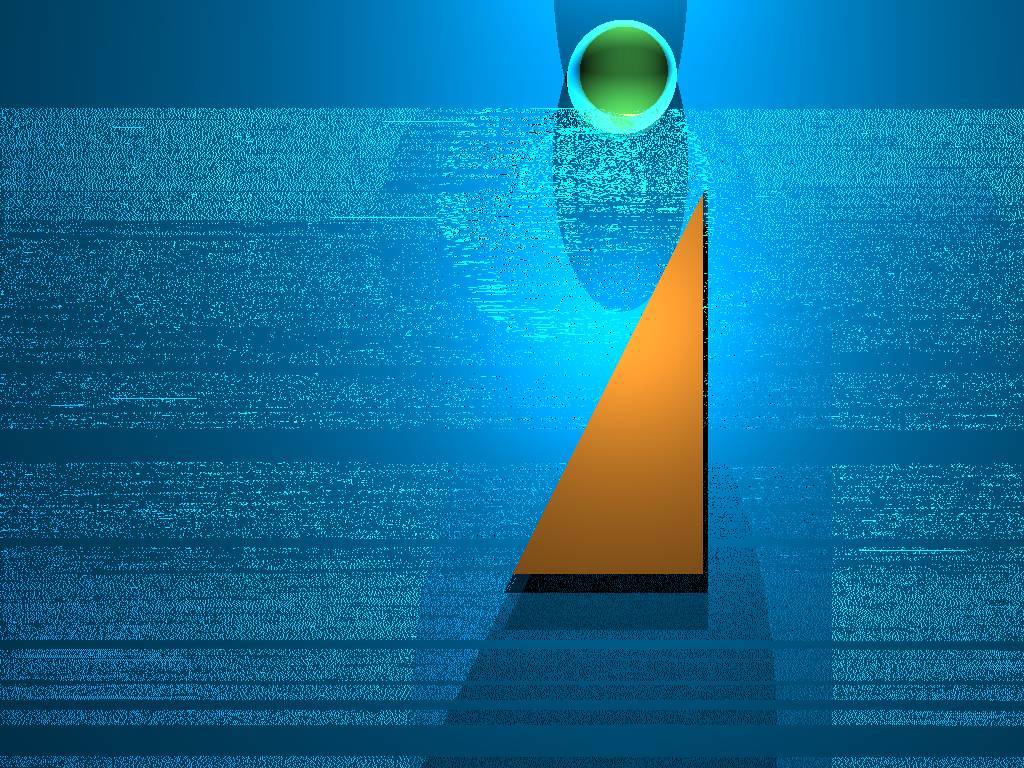
第一个图像是当只有thread0工作时,第二个图像是当只有thread1工作时:
![]()
![]()
再一次,它按预期工作,由于事实上只有一个线程正在工作(它可能无法从在线托管中看到,但可以从离线图像查看器中轻松看到),因此具有清晰的强黑行
现在,两人一起工作:
![]()
与之前非常相似。
运行程序时,我能够识别出某些像素的计算似乎不止一次发生:查看此控制台输出:
BOTO x: 403 y 405 thread_id: 1

BOTO x: 403 y 405 thread_id: 1

BOTO x: 403 y 405 thread_id: 1

BOTO x: 403 y 405 thread_id: 1
在ST情况下,只应打印其中一个。更奇怪的是,这是随机的。如果我在其他时间运行MT版本,这种重复可能会消失,但会显示在另一个屏幕像素上。 当这些打印信息重复时,其他信息也会有所不同:
>
 normal.x: 0 normal.y: 0 normal.z: -1.06 x: 400 y 409 thread_id: 0
intersection.x : -275.817 intersection.y: 61.5662 intersection.z: 283.019
x: 400 y 409 thread_id: 0
green: 0 x: 400 y 409
BOTO x: 400 y 409 thread_id: 0
blue: 0 x: 400 y 409
normal.x: 0 normal.y: 0 normal.z: -1.06 x: 400 y 409 thread_id: 0
intersection.x : -330.647 intersection.y: 73.8051 intersection.z: -283.019
x: 400 y 409 thread_id: 0
green: 1.23263 x: 400 y 409
blue: 1.86762 x: 400 y 409
BOTO x: 400 y 409 thread_id: 0
normal.x: 0 normal.y: 0 normal.z: 1.06 x: 400 y 409 thread_id: 0
intersection.x : -374.61 intersection.y: 83.6182 intersection.z: 283.019
x: 400 y 409 thread_id: 0
green: 1.36558 x: 400 y 409
blue: 2.06906 x: 400 y 409
BOTO x: 400 y 409 thread_id: 0
normal.x: 0 normal.y: 0 normal.z: -1.06 x: 400 y 409 thread_id: 0
intersection.x : -409.859 intersection.y: 91.4863 intersection.z: -283.019 x: 400 y 409 thread_id: 0
x: 400 y 409 thread_id: 0
green: 1.36558 x: 400 y 409
blue: 2.06906 x: 400 y 409
BOTO x: 400 y 409 thread_id: 0
我想要任何建议来弄清楚发生了什么。 如果有人对代码感兴趣: 一些代码(实现像素交替算法所需的更改):
void RayTracer::draw_multithread (Image *image, Scene *scene, int thread_id) {
  int ctr=0; //initial position of the array to write the color values
  int initial_x=0; //initial pixel
  if (thread_id==1) {
    initial_x=1;
    ctr=1;
  }

  if (thread_id==0) //to test one thread each time
    return;

  for (int y=0; y<image->getHeight(); y++) {
    //float px = px_inicial;
    //py = py + ystep;
    for (int x=initial_x; x<image->getWidth(); x+=2) { //+2 to alternate the pixels between threads
      ....
      ....
      ....
      b [ctr] = min (blue*255.0f,255.0f); //separate arrays for each color decided to use three temporarily to easy the MT implementation
      c [ctr] = min (green*255.0f,255.0f);
      d [ctr] = min (red*255.0f,255.0f);
      ctr+=2;   //increment in two due to MT
    }
  }
pthread_exit (NULL);
其他一些代码(为每个线程算法实现半屏所需的更改):
void RayTracer::draw_multithread2 (Image *image, Scene *scene, int thread_id) {
   float inv_div=0.5; //control how much work is made by each thread
   int ctr=0; //thread 0 starts on the beggining
   int y=0;   //same as above
   int initial_x=0;
   if (thread_id==1) {
     cout << "thread_1" << endl;
     ctr=1024*384; //thread 1 starts on the half
     y=384; // same as above
     inv_div=1; //necessary for thrad1 to do half of the rendering
   }

   if (thread_id==0)
      return;

   for (; y<(float)image->getHeight()*inv_div; y++) { //increment in one
     //float px = px_inicial;
     //py = py + ystep;
     for (int x=initial_x; x<image->getWidth(); x++) {
     b [ctr] = min (blue*255.0f,255.0f);
     c [ctr] = min (green*255.0f,255.0f);
     d [ctr] = min (red*255.0f,255.0f);
     ctr++; // also increments in one pixel each iteration
   }
 }
 pthread_exit (NULL);
MT设置代码:
pthread_t threads [2];
thread_data td_array [2]; //for being able to throw the MT methods on class
void *status;
TGAManager tgaManager ("z.tga",true);
if (tgaManager.isFileOpen()) {
tgaManager.writeHeadersData (image);
RayTracer rt (image.getHeight() * image.getWidth(),1);
int rc;
for (int i=0; i<2; i++) {
//cout << "main() : creating thread, " << i << endl;
td_array[i].thread_id=i; //thread identification to make possible the methods working differently according with the calling thread
td_array[i].rt_ptr = &rt; //to pass the same RayTracer instancy to each method, since the array where the pixels colors are written is there
td_array[i].img_ptr = ℑ
td_array[i].scene_ptr = &scene;
//cout << "td_array.thread_index: " << td_array[i].thread_id << endl;
rc = pthread_create (&threads[i], NULL, RayTracer::run_thread, &td_array[i]);
}
if (rc) {
cout << "Error:unable to create thread," << rc << endl;
exit(-1);
}
for (int i=0; i<2; i++ ) {
rc = pthread_join(threads[i], &status);
if (rc) {
cout << "Error:unable to join," << rc << endl;
exit(-1);
}
}
struct thread_data { // struct to pass all the required information for being able to let the MT methods on the RayTracer class
int thread_id;
RayTracer* rt_ptr;
Image* img_ptr;
Scene* scene_ptr;
};
static void* run_thread (void* ptr) { //calls the real multithreading method draw_multithread2 or draw_multithread
cout << "run_thread..." << endl;
void *nullptr;
thread_data* td = static_cast <thread_data*> (ptr);
td->rt_ptr->draw_multithread2 (td->img_ptr,td->scene_ptr,td->thread_id);
//td->rt_ptr->draw (td->img_ptr,td->scene_ptr);
return nullptr;
cout << "" << endl;
}
多线程光线跟踪方法的完整链接:https://gitlab.com/asmf2/asmfrt/blob/master/RayTracer.cpp 到MT设置
https://gitlab.com/asmf2/asmfrt/blob/master/main.cpp https://gitlab.com/asmf2/asmfrt/blob/master/RayTracer.h
0 个答案:
- 我写了这段代码,但我无法理解我的错误
- 我无法从一个代码实例的列表中删除 None 值,但我可以在另一个实例中。为什么它适用于一个细分市场而不适用于另一个细分市场?
- 是否有可能使 loadstring 不可能等于打印?卢阿
- java中的random.expovariate()
- Appscript 通过会议在 Google 日历中发送电子邮件和创建活动
- 为什么我的 Onclick 箭头功能在 React 中不起作用?
- 在此代码中是否有使用“this”的替代方法?
- 在 SQL Server 和 PostgreSQL 上查询,我如何从第一个表获得第二个表的可视化
- 每千个数字得到
- 更新了城市边界 KML 文件的来源?